回顾CSS float属性
现在再来讨论float属性似乎已经是outdated. 因为现在人们现在为了兼容性和开发效率更多的使用Grid system或者Flexbox布局代替float. 到现在为止对于float人们还有很多争议, 比如到底该如何使用float, 甚至该不该使用float.
float 起源
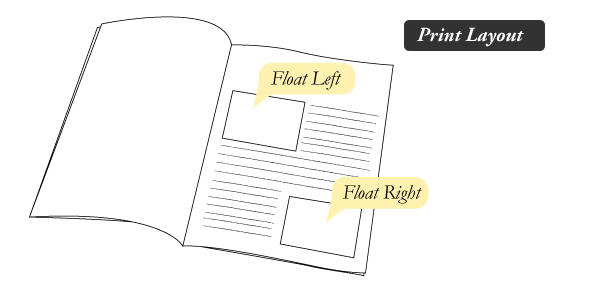
float最原始的目的是为了排版设计而使用的,在排版中我们常见的一种布局就是文字环绕图片(text wrap)像下面这样:
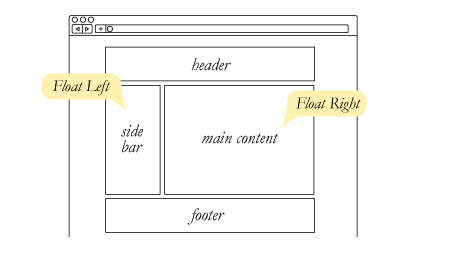
 后来float渐渐被用于网页布局中:
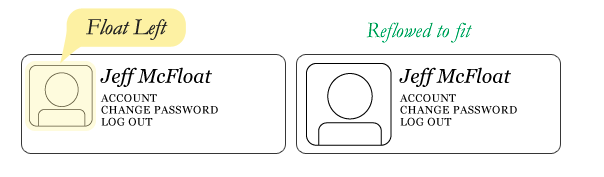
 再后来由于float的特性, float的应用更加广泛,被越来越多的应用在一些小部件上或者mobile-first的布局上.
float特性
Block元素的默认宽度占文档的100%宽度, 通常我们float一个元素left或者right它会给其他元素腾出一个空间,让其他元素能够占用这个空间。float有2个特性: wrap 和 collapse, 如果不理解它们, 在使用float的过程中往往会出现意料之外的结果.
包裹性
举一个例子来说明以下包裹性.
img是一个block元素, 宽度默认是100%
<div style="border:solid 0.5em hotpink">
  <img src="img-1.jpg" alt="" />
</div>
但当img外层的div设置为浮动的话,img元素则会被包裹起来,宽度会变成img的宽度,这就是所谓的包裹性
用一句话总结就是:
By default, block level element takes up document 100% width, but when floated left or right, it will resize according to the content it holds.
<div style="border:solid 0.5em hotpink;float:left">
  <img src="img-1.jpg" alt="" />
</div>
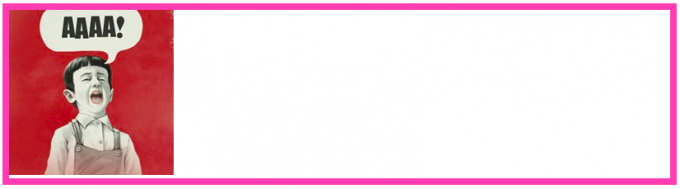
高度坍塌
当给img元素设置float属性时, 外层的div元素的高度会坍塌.
<div style="border:solid 0.5em hotpink">
  <img src="img-1.jpg" alt="" style="float:left" />
</div>
清除浮动
为什么要清除浮动?因为浮动会带来很多副作用,举一个例子,比如我们想实现下图布局
<header style="border:solid 0.5em hotpink">Header</header>
<aside style="border:solid 0.5em yellow; float:left">Sidebar</aside>
<article style="border:solid 0.5em red; float:right">Main Content</article>
<footer style="border:solid 0.5em green">Footer</footer>
但是, 我们得到的却是这样的结果:

从前面介绍的float特性的第一句话我们可以知道, 当Sidebar设置float之后, 它会腾出空间给其他元素, 其他元素会占用这个空间, 这个空间就被 Footer占用了。
那么, 如何实现我们想要的效果呢? 这时我们要使用clear属性来清除浮动所带来的影响。
clear属性有3个值
- left: 消除左浮动影响(将该元素推到左浮动元素下边)
- right: 消除右浮动影响(将该元素推到右浮动元素下边)
- both: 清除浮动影响(将该元素推到浮动元素下边)
举个例子来介绍这个属性:

前面两个是左浮动元素, 因此第三个元素会受到浮动的影响被推上去, 那么我们想把第三个元素推下来那就用clear:left。
<div style="float: left;">Floated Left</div>
<div style="float: left;">Floated Left</div>
<div style="clear: btoh">Not Floated</div>
让我们用图来更好的理解clear:both的作用:

在本例中, clear:both 就像一堵墙一样, 把浮动后面的空间挡住了,使原本被浮动影响要移动上来的元素被推了下去。了解了clear属性后,我们再回到之前的例子,我们只需要使用clear:both把Footer推下去
<footer style="border:solid 0.5em green;clear:both">Footer</footer>
此外,由于包裹性,aside和article元素没有宽度, 我们还需要为它们设置宽度
<aside style="border:solid 0.5em yellow; float:left;width:25%">Sidebar</aside>
<article style="border:solid 0.5em red; float:right;width:70%">Main Content</article>
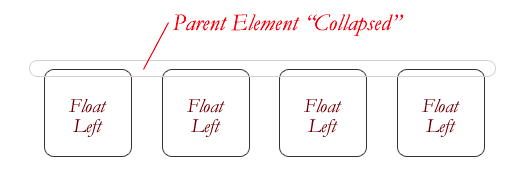
这样我们就解决了浮动所带来的影响,通过消除浮动的原理,我们可以定义一种通用的方法来清除浮动, 各种CSS framework也都会提供这个class, 那就是 clearfix, 看下图(高度坍塌特性)可以更直观的理解clearfix清除浮动的效果。

现代浏览器中定义一个clearfix非常简单:
.clearfix:after {
  content: "";
  display: table;
  clear: both;
}
看上面的代码 clearfix的原理也非常简单, 就是用一个空白的clear:both元素作为分割线, 浮动下面的元素无法受到浮动的影响而移动上来。

修改之前的代码为:
<header style="border:solid 0.5em hotpink">Header</header>
<div class="clearfix">
    <aside style="border:solid 0.5em yellow; float:left">Sidebar</aside>
    <article style="border:solid 0.5em red; float:right">Main Content</article>
</div>
<footer style="border:solid 0.5em green">Footer</footer>

Summary
float存在着很多问题, 在能避免使用float的情况下尽量不用float. 比如在实现下图的布局时, 最好使用display:inline-block来代替float:left.

float属性应该应用在实现一些类似文字环绕图片的效果, 如果需要使用float布局应该使用以下替代方案:
- Flexbox
- Grid Layout